Blogging on the MJA website provides a great facility to share information with other members, ask advice, promote your expertise, raise awareness of a pet cause or simply start a conversation.
Once you have completed your profile (click here for our ‘How to’) you are ready to post in the blog section of the website. Using the navigation at the top right of any page, go to My Account.
This takes you to your Dashboard, where you can create new blog posts via the link to the left of the page and see a summary of the blogs you have already posted in the central Dashboard, see below.
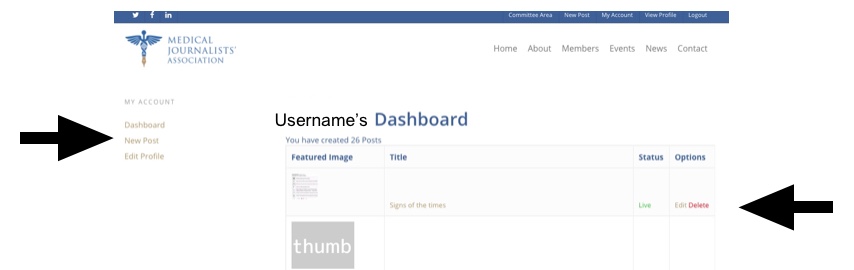 — This will show the Featured image, if you have uploaded one.
If not, the website will automatically add a thumbnail image of an iPad displaying the MJA website, which will show as ‘thumb’ on the Dashboard, as shown below.
Title is just that. Status shows your post is live and under Options you can click to Edit or Delete your post.
On the left you will see a menu which gives the option ‘New Post’. Click here to post a blog. It will take you to this window:
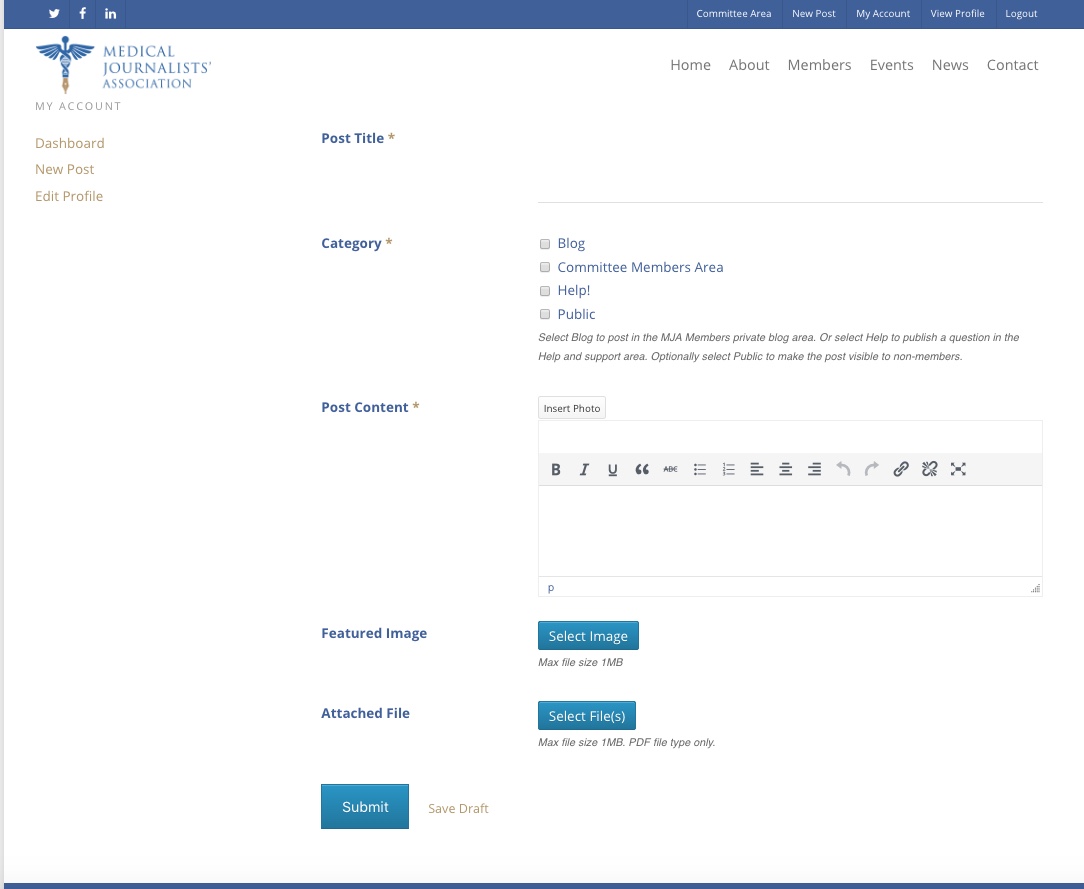
Post title is your headline
Category determines where your blog will appear (please ignore the Committee Members option shown on the grab, this is an area for members of the executive committee to share information).
Always tick Blog. If it’s a request for Help!, tick that option, too.
If you want your blog to be visible to non-members and members who have not signed in, tick Public.
If it is something you want to share only with MJA members, don’t tick this option.
Please note, if you only select ‘Public’ your post will not be visible. You must also select ‘Blog’ or ‘Help’.
If you want to include an image in your post, click Insert Photo and you will be given the option of uploading an image to the post. (Please be respectful of copyright if you are using an image which is not your own. If you want a generic image, advanced search on Google images allows you to look for images which are free for use.)
If you don’t upload an image, your published blog will appear as text only.
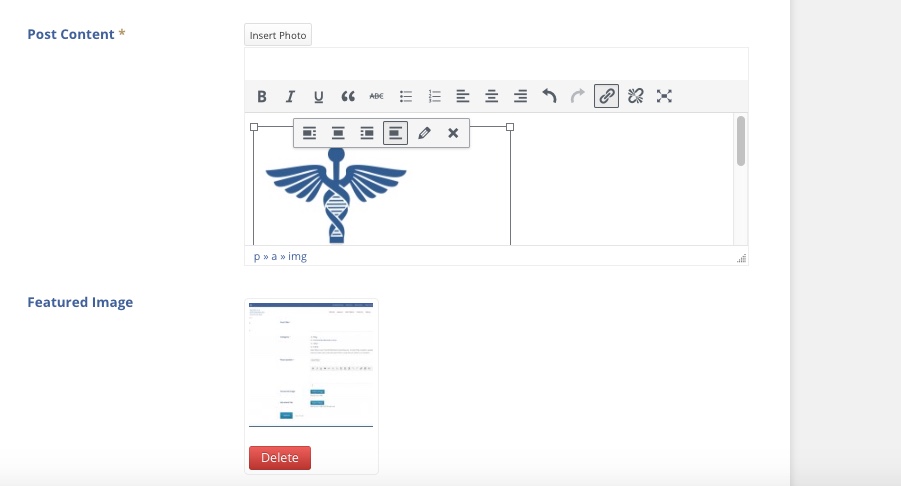
Assuming you have added an image, it will appear below the Insert Photo link.
The MJA logo is used in this example
If you want to edit the image, click on the image itself and a menu will appear above the image which offers some simple options.
The first four icons give options in terms of alignment, the pencil allows you to resize the image, and the X is to delet the image.
Below the Insert Photo link you will see a toolbar and larger window. This is where you type and edit your blog. As you will see, the toolbar gives the option of using bold, itals, underscores, text alignment and so on. The link is to upload a web link, the broken link is to remove a link.
Below this is Feature Image, which determines what will appear on the home page. You can upload an image by clicking the link, or leave it blank and our stock image of an iPad displaying the MJA website will be used. The website automatically crops the featured image into a landscape shape so you may need to recrop your image for it to display in full.
Attached File gives you the option of adding a document or another image — a pdf of flyer perhaps — but in most cases you can probably ignore this option.
Then finally you have the option to Submit or Save Draft. Once your blog has been submitted you can go back to the homepage to see how it will display to members. If there is something you want to change or tweak, just go back to your dashboard (see first image in this post). Under Options you can see the status of your post and links to Edit or Delete.
If you would like your post to reach a wider audience, you can use the social media icon on your blog to publish your blog poston Twitter, FaceBook, LinkedIn and other social media.
Recent Comments